Access Manager and Google Chrome v80

Configuring Support for Access Manager on Google Chrome Browser


Google Chrome version 80 onwards introduces a change of how cookies are handled in web browser with the enforcement of SameSite and Secure Cookie configuration. To support this Chrome version with Access Manager, you will need to configure the following options.

Removing Jump Break in Blogger

 How to remove Jump Break in Blogger


After clicking “Read more >>” in a Blogger post, the page reloads and jumps to the line after the jump break. If you want to remove this so that it loads the post normally like before.


Adding Jump Break in Blogger

How to Add Jump Break in Blogger

Jump Break is the out of box feature provided by Blogger to implement the "Read more" links on the blog's index page. Bloggers have been implementing "Read more" link(jump break) manually by editing their HTML which is complicated and error prone process.


With Jump Breaks, we could show just a snippet of our post on our blog's index page(home page) rather than showing the whole post content. Now a days, this is becoming a latest trend.


Why one should use Jump Breaks?


  • Speed up our page load time
  • Visitors see a selection of our posts without the need to scroll
  • Helps us to reduce the bounce rate of our blog - Visitors now have to click on the read more link to view the whole content.
  • Increase our page views

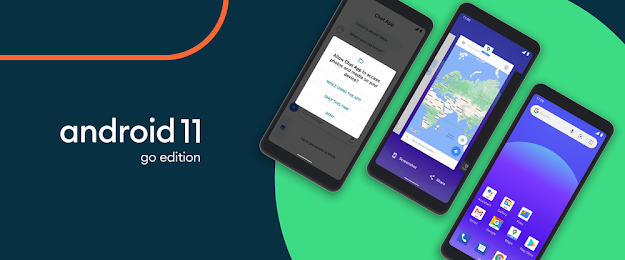
Google Android 11 Go Edition is Available

Android 11 - Launch Apps 20 Percent Faster


Android 11 just launched this week for Pixel devices and phones from OnePlus, Xiaomi, Oppo, and Realme, and now Google has detailed its counterpart designed for low-powered devices: Android 11 (Go edition).

One of the biggest new features is that Android 11 (Go edition) is supposed to work on devices with 2GB of RAM or less — a bump up from Android 10 (Go edition), which was made for devices with less than 1.5GB of RAM. But don’t necessarily expect to upgrade your existing 2GB phone: Android 11 Go is only going to come out with new phones with that much memory, not earlier ones, Google tells The Verge.

Also, Google says it’s up to OEMs whether they want to put Android 11 Go on a device instead of Android 10 Go, contradicting what was suggested in a document obtained by XDA Developers back in July. Google wouldn’t provide any examples of devices that can get the update.

Adding Google Adsense Ads Code Directly to Blogger XML Template

Advanced users of Blogger.com service may have tried to insert and put Google AdSense ad code which is actually a Java script directly into the blog pages by manually editing the XML-based template HTML coding interface. Actually, it’s possible add any ad code by using HTML/JavaScript page element within the Blogger new XML template system, but the place where you can place the new block is rather limited, i.e. above or below the post body, header, footer, within sidebar or between blog posts. In case you want to put the ads inside the post, or align the ads to float and wrap around the text, or just within the single individual article content view, you will have to edit directly the HTML coding of Blogger template.

If you try to insert any Google AdSense, AdBrite, AdEngage and any other JavaScript based ad code, or client-side components such as counter, tracker, form, snippet, effect, date and time, etc which is JavaScript based, the following error message may be returned when saving ore previewing:


Your template could not be parsed as it is not well-formed. Please make sure all XML elements are closed properly. XML error message: The processing instruction target matching “[xX][mM][lL]” is not allowed.

or

Your template could not be parsed as it is not well-formed. Please make sure all XML elements are closed properly.
XML error message: The reference to entity “zs” must end with the ‘;’ delimiter.

and many other different XML error message.

The problem is caused by incorrect dynamic interpretation of Blogger XML template when it generates the HTML webpage for the blog page that is requested, probably due to the fact that the AdSense ad code or other code is not a valid XML, coupled with the fact that some ASCII characters have special meaning and reserved functions, confusing Blogger blogging engine.

The resolution to the JavaScript based coding does not work in Blogger HTML template error can be solved by replacing special characters or symbols in the script to HTML code. Check out the list below for which ASCII characters that need to be replaced with their corresponding HTML code. Using HTML code will ensure that Blogger render the character correctly when serving the page to the viewer.

< = &lt;
> = &gt;

Above two is enough to make Google AdSense works in Blogger template. For other scripts, such as AdBrite ad code, you will need to replace more characters such as those listed below.

& = &amp;
” = &quot;

For example, a Google AdSense code should become looks similar to code below:

&lt;script type="text/javascript"&gt;&lt;!--
google_ad_client = "pub-XXXXXXXXXXXXXXX";
google_ad_width = 336;
google_ad_height = 280;
google_ad_format = "336x280_as";
google_ad_type = "text_image";
google_ad_channel = "";
google_color_border = "FFFFFF";
google_color_bg = "FFFFFF";
google_color_link = "000000";
google_color_text = "000000";
google_color_url = "000000";

//--&gt;&lt;/script&gt;
&lt;script type="text/javascript"
src="http://pagead2.googlesyndication.com/pagead/show_ads.js"&gt;
&lt;/script&gt;

While an AdBrite ad code will became the similar code to the below:

&lt;script type="text/javascript"&gt;
var AdBrite_Title_Color = '0000FF';
var AdBrite_Text_Color = '000000';
var AdBrite_Background_Color = 'FFFFFF';
var AdBrite_Border_Color = 'FFFFFF';
&lt;/script&gt;
&lt;script src="http://ads.adbrite.com/mb/text_group.php?sid=303771&amp;zs=3330305f323530" type="text/javascript"&gt;&lt;/script&gt;
<div><a target="_top" href="http://www.adbrite.com/mb/commerce/purchase_form.php?opid=303771&amp;afsid=1" style="font-weight:bold;font-family:Arial;font-size:13px;">Your Ad Here</a></div>

Simply use the text editor to parse the code and then replace the characters. Don’t worry about violating AdSense TOS or other terms and conditions, as once the blog’s web pages are rendered and presented to the viewers and visitors, the code will be exactly same as the original code before any replacement!

Which Adsense Format & Color Scheme Will Work Best for You ?

Should I use the 300x250 Adsense Rectangle or the much wider 336x280 for maximizing clicks? What do I select - 4 or 5 ads per Adlink unit ? Will text only ads perform better than text+image ads ? Should I hide the colored border ?

These are some very common questions among web publishers especially those who have just gained admission to the University of Adsense. While the answer is to keep on experimenting, most Adsense experts employ a simple technique called "AB Split Testing" to optimize their Adsense Ads.

The basic idea is to display different Adsense formats at the same location simultaneously but randomly. [This is done using the random() function in Javascript that generates a number between 0 and 1 with equal probability]

google adsense reports

Here's a sample scenario to help you determine what format works best for your site - 300x250 or 338x280 ?

Step 1: Create two custom Adsense Channels - name them as 300x250 and 336x280.

Step 2: Generate the Adsense Javascript code for each of these Adsense formats. Everything will be common in two code snippets except the value of following variables: google_ad_channel, google_ad_width, google_ad_height and google_ad_format.

Step 3: This is an important step, you will merge the two Adsense snippets in such a fashion that each makes an appearance on your web pages nearly 50% of the time. Here's a sample code:

<script type="text/javascript">
var google_ads = Math.random();
if (google_ads < .5){
google_ad_channel = "300x250Channel";google_ad_width = 300;
google_ad_height = 250;google_ad_format = "300x250_as";
} else {
google_ad_channel = "336x280Channel";google_ad_width = 336;
google_ad_height = 280;google_ad_format = "336x280_as";
}
google_ad_client = "pub-xxx";google_ad_type = "text_image";
google_color_border = "FFFFFF";google_color_bg = "FFFFFF";
google_color_link = "0000FF";google_color_text = "000000";
google_color_url = "0000FF";
</script>
<script type="text/javascript"
src="http://pagead2.googlesyndication.com/pagead/show_ads.js">
</script>
Monitor the performance (CTR, eCPM) of the two Adsense channels for a week or two to know which of the two Ad formats are converting better. [Switch to Advanced reports, select the two Adsense for Content channels and group by both date and channel]

In the next iteration, you may try the same trick with two different color schemes but keeping the Ad format same - just create separate Adsense channels for each color scheme.

If you are displaying Adsense ads on the homepage of blogs or other places where content changes very frequently, it's a good idea to test between Text and Text+Image Ads.

The contextual ads may not be very relevant on blog homepage or archives because of the dynamic content and therefore CPM based Image ads may bring in more revenue.

Show Google Adsense Ads Below Post Title and Post Body

In this tutorial I will explain how to place Adsense Ads below post title in Blogger Blogs with lots of customization tips. You might have noticed that most of the bloggers show Google Adsense ads below title to increase their "Click Through Rate" (CTR) and earnings.

According to Google Adsense help pages " Where to place Adsense Ads ?". Placing Adsense ads below title and above article content can bring high CTR and performance.


How to place Adsense Ads between Blog posts:

By doing this,the Adsense units will be displayed between the blog posts in the homepage, archive pages and permalink (individual post pages).


1. Sign in to your Blogger Dashboard > Click on the Layout link


2. Click on the Edit link in the "Blog Posts' column [look at the below screenshot]

A pop up window opens ...

3. Check the box next to 'Show Ads Between Posts'

Next, Configure the Inline Ads, choose the Format, Colors etc and SAVE THE CHANGES.

That's it! Now your Adsense Ads will show between blog posts.


Showing Adsense Ad only in Post pages :-

1. Sign in to your Blogger Dashboard > Layout > Edit html

Check the box next to 'Expand Widget Templates'

2. Scroll down the window till you see this code

<b:if cond='data:post.includeAd'> <data:adEnd/> <data:adCode/> <data:adStart/> </b:if>


3. Replace that code in the template with the below code

<b:if cond='data:blog.pageType == "item"'> <b:if cond='data:post.includeAd'> <data:adEnd/> <data:adCode/> <data:adStart/> </b:if> </b:if>

4. Again, scroll down the template and find out data-post body tag

Copy the following code :-

<b:if cond='data:blog.pageType == "item"'> <b:if cond='data:post.includeAd'> <data:adEnd/> <data:adCode/> <data:adStart/> </b:if> </b:if>

If you want Ads to show above the Post Body after the Post Title, paste the code above that tag.


If you want Ads to show below the Post Body, paste the code below that tag.


If you would like to show them at both the top and bottom of your posts you should only show them on the post pages since we are only allowed to display a certain amount on each page so to get them at the bottom and top of your posts.

<b:if cond='data:blog.pageType == "item"'> <b:if cond='data:post.includeAd'> <data:adEnd/> <data:adCode/> <data:adStart/> </b:if> </b:if>


Paste the code above and below the <data:post.body/> tag so it should look something like the following screenshot


Save the template and view a post on your blog you should see Ads at the top and bottom of the Post Body.

Leave you comments if you like the post or if you have any questions doubts.